How to Test Microwave Leakage at Home Safely
Microwaves have become an essential part of modern kitchens, making cooking and reheating food faster and easier. But like any appliance, they are not immune to wear and tear. Over years of use, the door seals, hinges, or internal components may weaken, raising concerns about possible radiation leakage.
Though microwave ovens are designed with multiple safety features to contain radiation, it’s still wise to check periodically—especially if you notice damage, hear unusual noises, or your microwave is quite old. The good news is, you can test for microwave leakage at home safely with the right tools and precautions. To Know More Click Here

Why Microwave Leakage Matters
Microwave ovens operate using non-ionizing electromagnetic radiation at a frequency of 2.45 GHz. This radiation excites water molecules in food, generating heat. Inside the sealed chamber, this process is safe and efficient. But if radiation leaks outside the unit, even in small amounts, it could be harmful over time.
Potential risks of leakage include:
- Eye damage: Prolonged exposure may cause cataracts.
- Skin irritation or burns: Localized heating on exposed areas.
- Headaches and fatigue: Possible from low-level prolonged exposure.
Most importantly, even though standards limit leakage to a safe threshold (not more than 5 mW/cm² at about 2 inches from the surface), it’s always better to be cautious.
Signs That Your Microwave May Be Leaking
Before you test, look for warning signs that suggest your microwave might not be sealing properly:
- The door doesn’t close tightly or feels loose.
- You notice sparks, buzzing, or unusual sounds when it operates.
- Food takes longer than usual to heat.
- Rust, cracks, or dents around the door frame or seals.
If any of these signs are present, testing becomes even more important. To Know More Click Here
How to Test Microwave Leakage at Home
1. Perform a Careful Visual Inspection
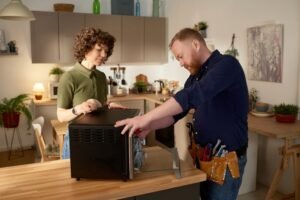
Start with the simplest step. Examine your microwave’s door, seals, hinges, and outer body. Damage such as bent metal edges, chipped paint, or loose hinges can all affect the seal integrity. A broken or misaligned door seal is the most common cause of leakage.
2. Use a Microwave Leakage Detector (Most Reliable Home Test)
- Buy a small handheld microwave leakage tester (widely available online).
- Fill a microwave-safe cup with water and place it inside (running the microwave empty can damage it).
- Set the microwave on high power for at least one minute.
- While it runs, slowly move the detector around the door edges, hinges, and vents.
- Readings above 5 mW/cm² suggest that the microwave may be unsafe.
Pro tip: Test more than once to ensure consistent readings. If the reading is high, discontinue use and consult a technician.
3. The Mobile Phone Signal Test (Quick but Inexact)
This test is popular but not scientifically accurate. Here’s how it works:
- Place your mobile phone inside the microwave (do not turn it on).
- Close the door.
- Call your phone from another device.
If the call goes through, it may indicate that the microwave’s shielding isn’t working properly. However, this method is unreliable because microwave ovens block microwave frequencies (2.45 GHz), whereas mobile phones use different frequencies that may or may not be affected in the same way. Use this only as a rough indicator.
4. Check the Door Safety Interlock System
Microwave ovens are designed to stop immediately when the door is opened. If your microwave continues to run even when the door is slightly open, the interlock system is broken. This is a serious safety issue, and the microwave should not be used until repaired. To Know More Click Here
Safety Tips While Testing
- Always have water inside the microwave when running it during tests. Running empty can damage the magnetron.
- Do not press your face close to the microwave while testing.
- Avoid DIY repairs on the door or seals. The design is precise, and tampering can worsen leakage.
- If you suspect leakage, it’s better to replace the microwave than risk prolonged exposure.
When Should You Replace Your Microwave?
Even without leakage, microwaves have a typical lifespan of 8–10 years. Consider replacing your unit if:
- It has visible cracks, rust, or broken seals.
- It repeatedly fails leakage tests.
- It doesn’t heat food evenly anymore.
- You hear unusual buzzing or smell burning odors.
Modern microwaves come with stricter safety regulations and improved shielding, making them safer and more efficient. To Know More Click Here
Conclusion
Testing your microwave for leakage at home is simple and can give you peace of mind. While visual checks and phone tests provide basic reassurance, the most reliable way is to use a microwave leakage detector. Remember, safety should always come first—never ignore visible damage or test results that suggest leakage. When in doubt, consult a professional or replace your appliance altogether.
A safe microwave means a safe kitchen. With a little care and periodic checks, you can continue using this modern convenience without worry.
SafeTag – Your Safety Partner in New Zealand
Ensure workplace safety and compliance with SafeTag’s professional testing services. We offer certified solutions for Electrical Testing & Tagging, RCD Testing, Microwave Leakage Testing, and Portable Appliance Testing (PAT). Trust our experts for hassle-free, on-site service tailored to your business needs.

